Simple tips for smart phone photography
Here are three instant ways to improve the quality of your miniature photography using just a smart phone!
Hey guys! Caleb with White Metal Games here, your source for miniature painting, kit-bashing, and consignment!
Recently I was commissioned by a client to restore an old Hierophant. This is a Forge World model of course and it came to the studio in need of a little repair. I will cover the restoration of the model in another article.
The client in this case already had an existing color scheme for his army. While I’m happy to match client work it’s helpful when I can get a photo showing me a typical model in a clients army. This helps me in terms of not only matching color but also matching style and technique, with the hopeful goal being that the model blends into his existing collection as seamlessly as possible.
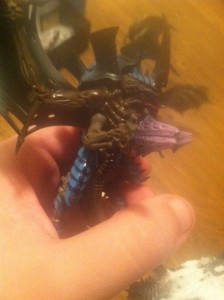
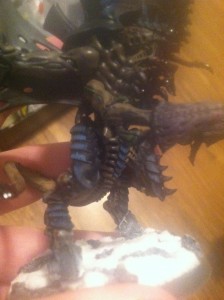
The client sent me a couple photos of a Flying hive tyrant. The photos were . . . eh . . . just okay. They were dark and a little fuzzy and it was hard to make out all the details. Even though I was able to duplicate the color scheme of his army pretty well using just these photos, it got me thinking about photography for smart phones. There’ve been tons of articles about this online already, so today I’m just going to focus on how this applies to miniatures. Rather than bombard you with a lot of details about focal length, depth of field and the like, I thought I would just provide a few simple tips.
Unlike the human eye, which can differentiate between details and colors with incredible clarity even in low light conditions, a camera lens is different. And while most smart phones usually incorporate pretty state-of-the-art cameras, even they need help from time to time. So here are some easy to apply lessons for photographing your miniatures with a smart phone camera or other mobile device.
Tip #1: Light Equals Bright
Nine times out of ten the problem with any basic photo is lighting. Specifically not enough of it. Most people photographing a miniature do so on the kitchen counter or workstation counter or somewhere that is pretty far away from a light source.
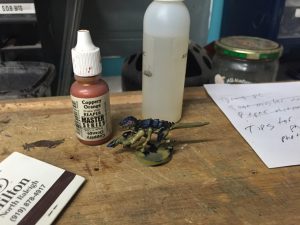
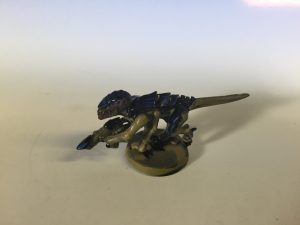
Here’s a good example of a photo I snapped a recent miniature just sitting on my workstation.
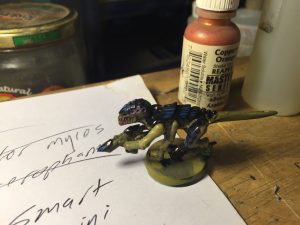
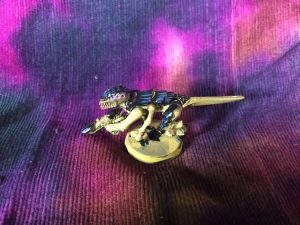
Looks pretty dark and lackluster right? Now look what happens when I move a simple 40 W incandescent light bulb within about a foot of the model.
The photo no longer appears so dull and lifeless, but has some depth to it. That’s because the camera isn’t working so hard to properly expose the image. Now the shadows are rich and black and the model itself appears warmer and more inviting to the eye. It seems obvious but the simple solution can improve your miniature photography by hundred percent right off the bat.
Adding light will also do things like increase the depth of field and allow your autofocus feature on your camera to do what it supposed to do, focus. When there’s not enough light autofocus has a hard time figuring out what you’re trying to photograph because of this it will shift back-and-forth between different objects in the frame, and the subject of the photo will be unclear.
Tip #2: Watch Your Backgrounds
Imagine you’re a fine art museum and the Mona Lisa is on display. It’s beautiful it’s elegant it’s inspiring. Now imagine the Mona Lisa setting by a pile of garbage. Same painting, but the background entirely changes how you feel about it.
If you want the focus of your photograph to be a miniature you should limit what else is in the frame. The easiest way to do this is to put some sort of backdrop or even just a simple piece of paper behind the models. There are different schools of thought on this but as a general rule of thumb a simple background allows the viewer to focus on the object of the photo. In this case the miniature.
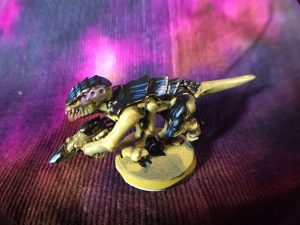
That doesn’t necessarily mean you just want a blank piece of paper. Using a gradient piece of paper, like the one you see here, will provide a nice simple background without detracting from the object of the photo. You can use a simple piece of cloth, such as pure black or white, or even one that has a very basic design on it. Look for something with simple colors and not very abstract. You can normally get a yard of fabric at a local fabric shop or quilting shop for less than five dollars. Simply lay out the piece of fabric behind your model and center your miniature in the front.
You can even put something beneath the cloth, such as a book or DVD. Anything to elevate the model slightly and get a little depth.
A final suggestion would simply be to take an old
Tip #3: Add a Lens!
Within the last year a feature-length film was shot using only smart phones and some specialty equipment. Part of that Specialty Equipment were lenses that of been designed for the smart phone. There are lenses that clip on, lenses that are magnetized, and universal lenses! Since they are modular you can take them off easily when you don’t want to use them, like when you’re out with friends at a bar or at a restaurant. I purchased two lenses on the Groupon deal for my iPhone six. I got a wide angle lens and a macro lens. The wide-angle lens is great for a long depth of field what I want to have lots in focus. It’s also wonderful and fun photographing something big like an army or tightened. The macro lens on the other hand is great for close-up work. Check it out:
The Macro Lens really shows you all of the little details of the figure. Which leads me to my next point . . .
Tip #4: Too close can be a bad thing
A nice macro lens can pick up the details on something that your normal eye could not. What this means is any mistakes you made on the miniature, even if invisible to the naked eye (such as your own), will show up in a photograph with painstaking clarity. I’m often surprised when I finish a miniature and I look it over for errors, don’t find any, and then later looking over photographs see one or two little blemishes or my brush just didn’t hit the mark quite right. While for the most part this is forgivable, a client may be confused about their miniatures almost as though you’re highlighting the mistake she made versus just showing the good parts.
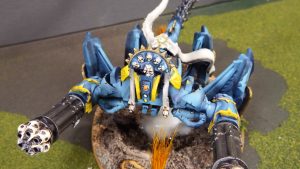
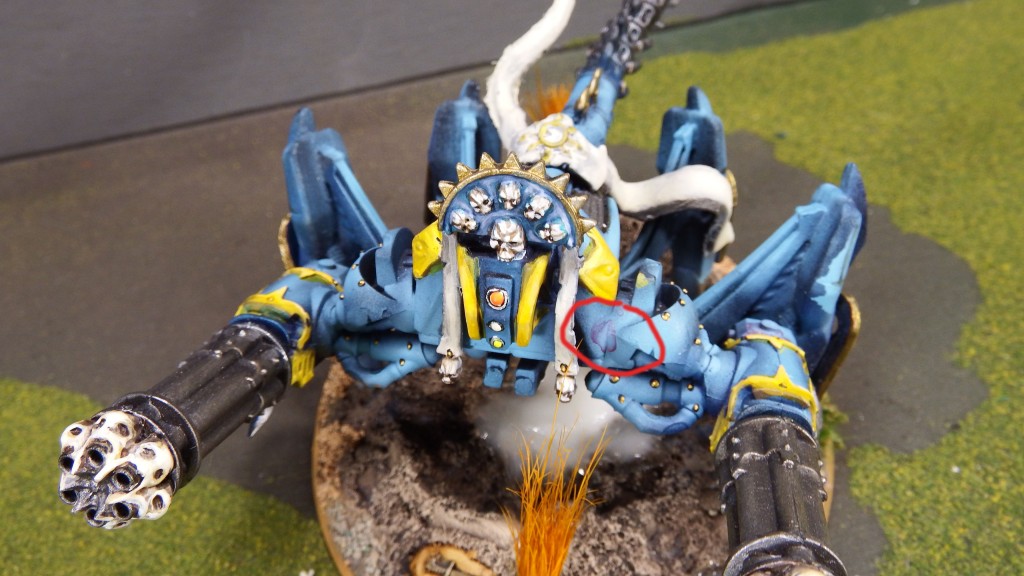
Here’s a good test. In the below photo of a custom Forgefiend for a Thousand Sons army, see if you can easily find the mistake. Can you easily see it?
I’m going to leave some blank space here. Don’t cheat the scroll down yet.
Lala-la-la-lah . . . . . . bum-bu-bah-bu-bum.
Now look again. See it now. Just a little wash that didn’t dry quite right. Easy enough to fix. But somehow, until we photographed this model, we missed it.
It’s very difficult to make clients understand that the way a miniature shows up on a photograph is not necessarily the way it will appear to the casual viewer.
This is just something you get used to when photographing models. However as a soft rule of thumb try not to get too close to your miniature, unless you feel very confident that your brush placement is 100% accurate. Else don’t be surprised when you take a very close photo and you find some sort of simple mistake.
Tip #5: Consider Updgrading to a CHEAP digital camera.
This it may seem like a weird tip considering the title of this article is photography tips for smart phones. However you’re going to quickly learn if you get in the miniature photography in any capacity that you’re going to want to take photos that you can both edit and manipulate.
Why your smart phone does have a few basic features for editing photos such as brightness, saturation, and a few filters, it’s not quite as involved as using a basic photo editing tool.
There are a lots of free editing programs they do come with your basic PC or that you can download for free. The windows media viewer comes to mind. A lot of media viewers also now incorporate simple editing functionality, such as brightness, contrast, and cropping, as well as allowing you to flip images or rotate them.
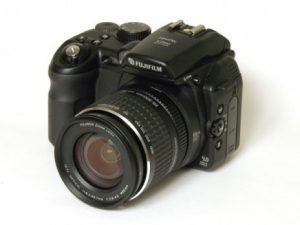
Digital cameras have become something of a commodity in a world where everybody’s camera phone does basically the same thing. Or so the phone companies would have you believe. My first camera for serious miniature photography was a Fujifilm Finepix 2800 that cost me about $50 at the time, and goes for about $30 now. $30 bucks! Less than a tank of gas or a night at the movies!
I used it for about three or four years before finally upgrading to a slightly nicer version the exact same camera. Really what you’re looking for in a basic digital photography camera is very simple. You want to macro lens that allows you to capture details up close, and you want an optical optical zoom that will allow you to really get in close. The older model Fujifilm above has 6x magnification, which is plenty for mini photographry, and has a macro lens which focuses at 10cm! The newer version focuses as close as 2cm and has 30x magnification! So really it just depends on your budget. But at $30 for a digital camera, you can really up your mini photographry game for little to no cost.
While I don’t recommend this for the casual gamer, if you’re thinking about getting into commission painting at all you’re going to want to update your clients with good photos. And while I love my smart phone for photos on the go, it’s definitely not something I use for my portraits or portfolios.
Another tandem benefit is that when your offloading-year-old miniatures on eBay or the like it will allow you to take better photos, and thus get a better price. I can’t count the number of times I’ve heard of an army, lovingly painted, that sold for pennies on the dollar on a secondhand market. When I looked at their listings nine times out of 10 the problem are the photos are unclear and you can’t really see all the details. So if you buy the camera with the goal being to sell an army, you’ll see an immediate return on your investment. And remember you can always sell the camera later if you don’t like it.
I hope these simple tips will help you with photographing your miniatures, and until next time-
PUT YOUR MINIS WHERE YOUR MOUTH IS!
Caleb Dillon
White Metal Games
If you enjoyed this article, be sure to like it, share it with others, and subscribe!
Find us on the web: https://whitemetalgames.com
Like us on Facebook: https://www.facebook.com/WhiteMetalGames
Listen to our podcast! We are currently looking for a new co-host . . . is that you?
https://itunes.apple.com/us/podcast/war-council-podcasts/id714553888
Shop in our store: http://stores.ebay.com/White-Metal-Games
Follow us on Twitter: https://twitter.com/WhiteMetalGames
Add us on Flickr: http://www.flickr.com/photos/whitemetalgames/
Follow our blog: LINK FORTHCOMING!

