The Cons of Pro-Painting
Be careful what you wish for. One painter explains to you what it’s really like to paint for a living.
“I’m out! Like all the way out,like I’m selling everything.”
Be careful what you wish for. One painter explains to you what it’s really like to paint for a living.
“I’m out! Like all the way out,like I’m selling everything.”
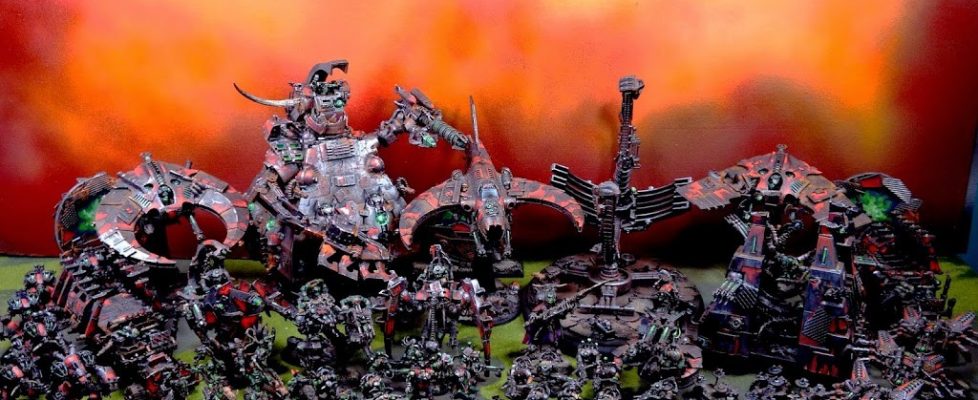
Greetings fellow wargamers! Caleb with White Metal Games here. This article deals with a collaborative project recently undertaken by my studio and another miniature painting service.
Behold the Necrorks!
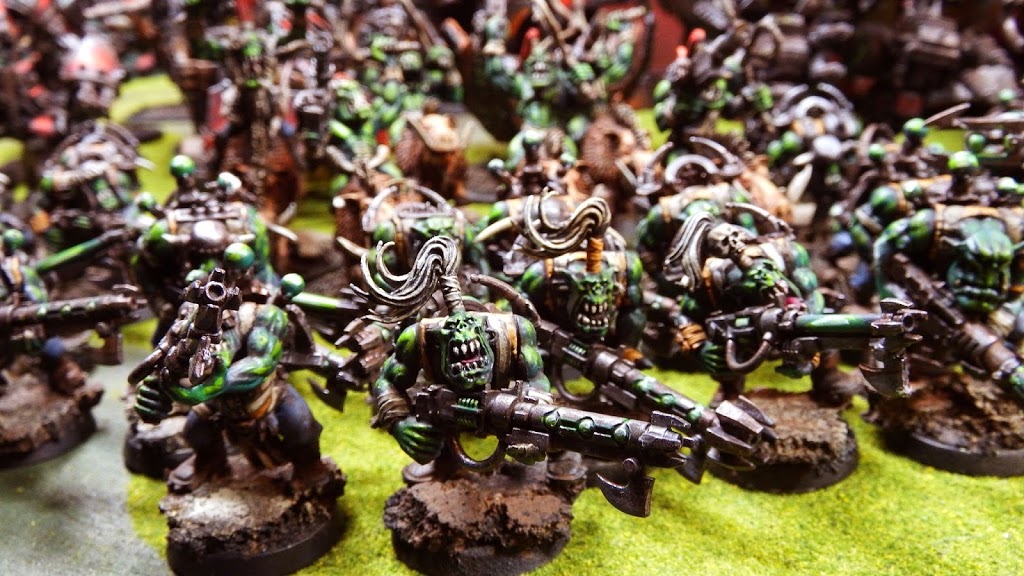 Most of you know the work of Thomas Reidy, a.k.a. ‘Goatboy’ from Full of Monkey painting. His style of art, dubbed ‘graffiti painting’ by some, is both unique and easy to spot on the table.
 We both knew what was expected of the other: I would build and kit bash the army combining a variety of kits and Thomas would handle the painting aspect. Since I’m not an active tournament player myself I asked Thomas for help in developing a semi competitive list that would also allow me plenty of opportunities for kit bashing madness.
 Since the army has been completed the new Necron Codex has sense come out again, and this allows players a variety of new options.
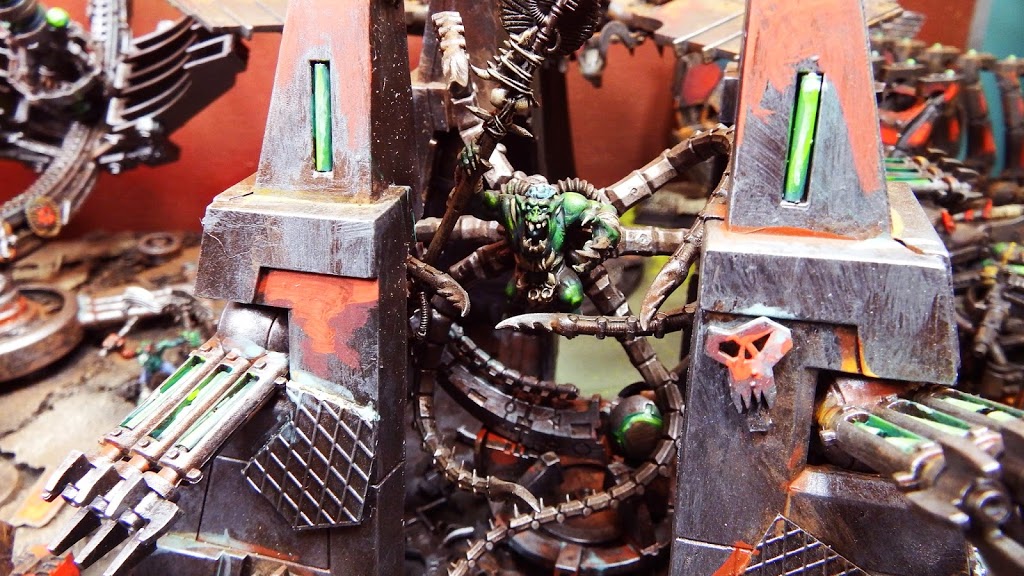
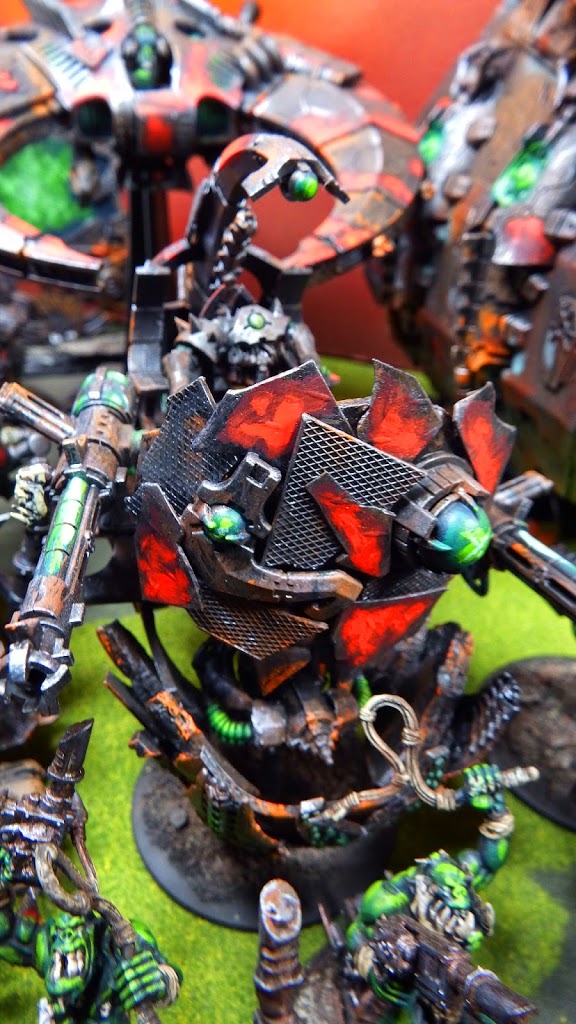 A few of my favorite units in the entire army have to be the Stoppa which can also count as a Tesseract Vault, as well as the 2nd Annihilation Barge, dubbed the ‘Tesserork’, to allow it to also count as a Tesseract Ark from Forgeworld. In addition the army features a Gauss pylon, as well as over 50 Ork Boyz!
 As mentioned before, unbound armies really allow the hobbyist to do what so ever they choose. I’ve had lots of ideas for new projects since beginning this one, the possibilities really are endless. Some of the ideas we discussed include a Werewolf themed Space wolf army, a true Genestealer Cult army featuring Astra Militarum and Tyranid forces, and a Kabuki themed Eldar army.
If you love his style of painting, be sure to check out more of Thomas’ great work at Full of Monkey Painting. You can also check out more of my fun kit bashing projects on my facebook page. The creative spark is something that is unique to every miniature painting service; no two painting services tackle a project exactly the same way. When you hire a miniature commission artist, you really are paying for their creative insight and that spark of inspiration.
THE LIST: Over 4000 pts
Necron (with Ork suggested ‘counts as’ choice)
HQ:
Destroyer Lord, Sempiternal Weave, Mindshackle Scarabs (counts as Warboss on Bike)
Necron Overlord, Sempiternal Weave, Mindshackle Scarabs (counts as Warboss)
Crypteks- Harbringer of the Storm, Despair,etc x3 (counts as Weirdboyz or Ork Boss, etc)
Crypteks-Harbringer of Destruction x2 (counts as Mekboyz w/kustom mega blasta)
Troops and Transports:
Necron Warriors x 30 (Count as Shoota Boyz)
Ghost Arc x2 (count as trukks)
Nightscythe x 3 (counts as Dakkajets)
Elites:
Necron Immortals x 10 (Count as Lootas)
Canoptek Stalker
Fast Attack:
6 x Wraiths (Ork Boarboyz, count as Bikers)
3x Tomb blades (count as Deff Koptas)
10x Scarab Swarms
Heavy:
Annihilation Barge
Tesseract Arc (count as Annihilation barge as needed)
Destroyers x 5 (count as Bikers)
Monolith (counts as Battle Wagon)
3x Tomb Spyders
Lords of War:
Stompa (count as Tesseract Vault)
Empowered C’tan
Gauss Pylon
BONUS:
3X Kustom Gate Markers for Objectives
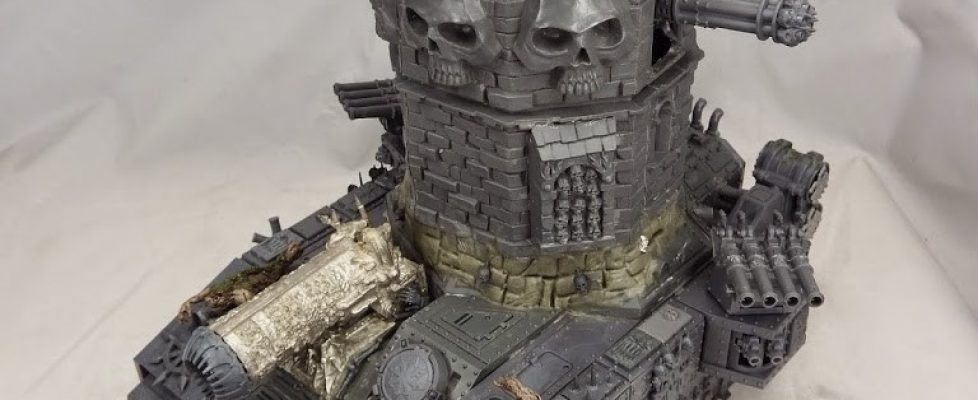
Greetings fellow wargamers! Caleb with White Metal Games here and I have a special kit bash article for you today.
For this particular project I knew I wanted to start with the biggest tank I could find, and of course that would be the Baneblade. I picked one up on eBay for a steal. The trick was it was already pre-assembled for the most part so I knew I was gonna have to gut certain parts from the model.
Mounting the guns required a bit of ingenuity,. For the Organ guns I mounted them above the side turrets.. This is pretty straight forward, but for the Forgefiends guns I wanted to mount them inside the tower coming through the parapets. For this I had to go inside the tower, already fully built. Although no one will ever be able to see it, there is actually a sort of wench mechanism inside the tower utilizing bits from Imperial guard Valkyrie. This allowed me to hold the guns in place. Then with a little glue and some putty I was able to hold them in place permanently to ensure that they would never shift around.
After all that was said and done with I went about sealing any gaps with said putty and sculpting on any small details that I needed. I used a variety of small bits lying around my bits box to ensure the model looked chaos enough, and didn’t betray it’s Imperial origins.
Finally a use for all these metallic paints I’ve been collecting!
Greetings Fellow Wargamers!
Caleb with White Metal Games here! And today I have a short and sweet tutorial for you!
Over the years I’ve had plenty of chances to work on heat distressed metal effects.
I’ve tried pigments and weathering powders, such as on this Custom Big Mek Stompa, below.
I’ve tried Ghost Tints, such as seen below on this Adeptus Soritas Knight.
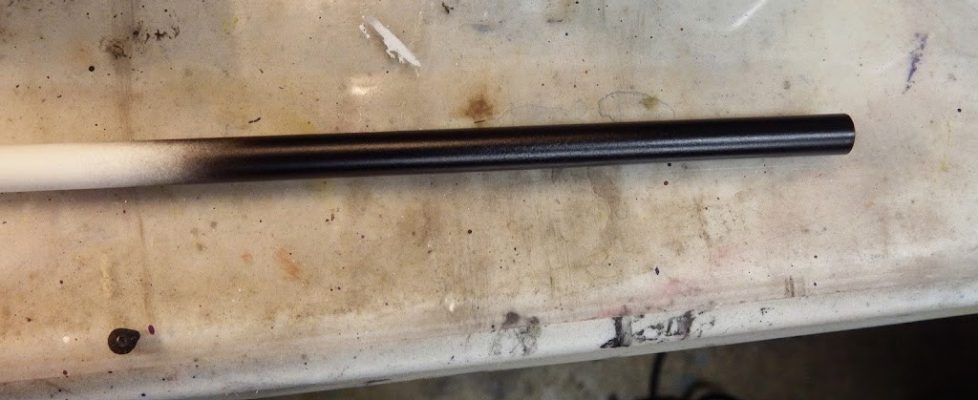
Prime black, then basecoat with a gunmetal type color. I used Vallejo Model Air Gunmetal for this. Bear in mind when using metallic airbrush paints, the metal flakes will often clog the airbrush, so thin the mixture down slightly and be sure to clean the airbrush well after use to avoid any dried metallic flake left over in any component of the airbrush.
Next lay down a warm metallic color. I used Vallejo Model Air Rust, because it’s a warm copper like metal color. I think gold or copper would be fine, depending on the effect you are going for, but I’m really digging VMA Rust at the moment! Just be sure to leave some of the original gunmetal color showing, since you want to indicate where the heat effect begins!
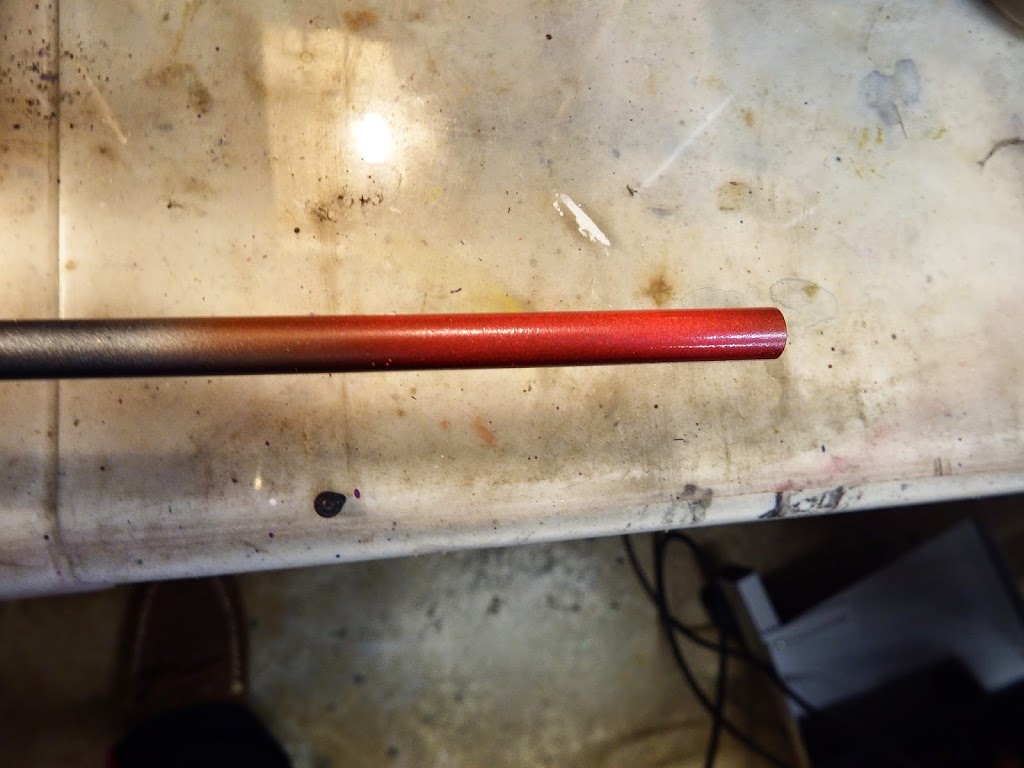
As before, be sure to leave some of the underlying color shining through. Airbrushes are great for blending, since the outer edges of the spray cone are by default a thinner spray that your targeted area. So just go light on the end and you should be fine.
Next, apply some Purple Metallic. I used Createx Pearlized Purple (seeing a trend here yet). The purple blends really reall with the red from the next step, and being a natural color progression from red to blue, you’ll see how easily this blends in the next step.
Finally, apply some Blue Metallic. Guess what I used? Createx Pearlized Blue. 10 points if you guessed it. In the background you can see a heated metal picture of a car engine I used as a reference point for this tutorial. To see an actual example of this effect in action, see the pictures below.
Breaking up gun barrels with a slight heat effect is a wonderful way to add a little color to a normally otherwise dull part of most models. Imagine Tanks and Cannons with heat distressed barrels trundling around the battlefield. This is an easy way to distinguish your favorite vehicles without spending a great deal of time or energy on the project.
If you found this tutorial at all useful, be sure to Like Us on Facebook! It really does help!
PS: No sooner had I finished this tutorial then I came across this incredible video tutorial by Savage Forge Minis. His tutorial is slightly different than mind, including the good idea to add some soot to the weapon tip. I guess great minds think alike. Way to go guys! Be sure to check out all their fabulous video tutorials while you are watching the above vid.
Until next time, put your Minis Where Your Mouth Is!
Caleb, White Metal Games
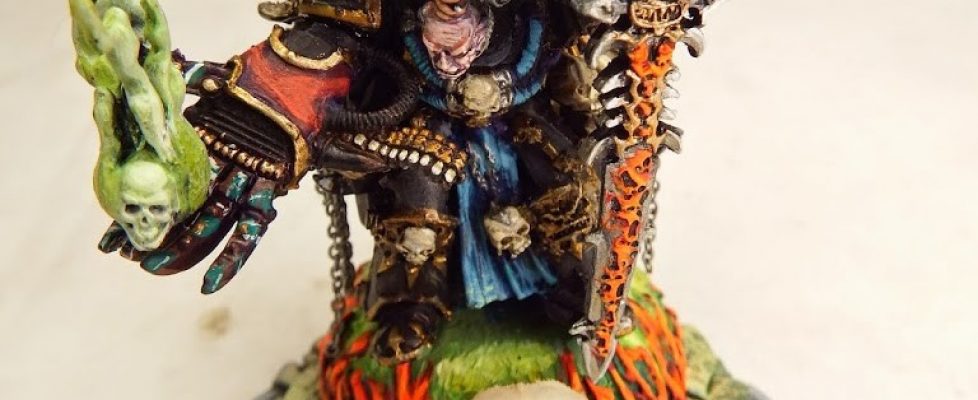
Welcome to Conversion Corner, where we display great looking converted and Work In Progress (WIP) models from stuff we’ve done or amazing figures we’ve seen around.
If you click on the Conversion Corner label you’ll be able to scroll through some great looking conversions and more, all at once.
Checkout this Abaddon the Despoiler on Iron Throne by White Metal Games. The model was painted by John Elbro, one of White Metals resident painters.
-Enjoy MBG
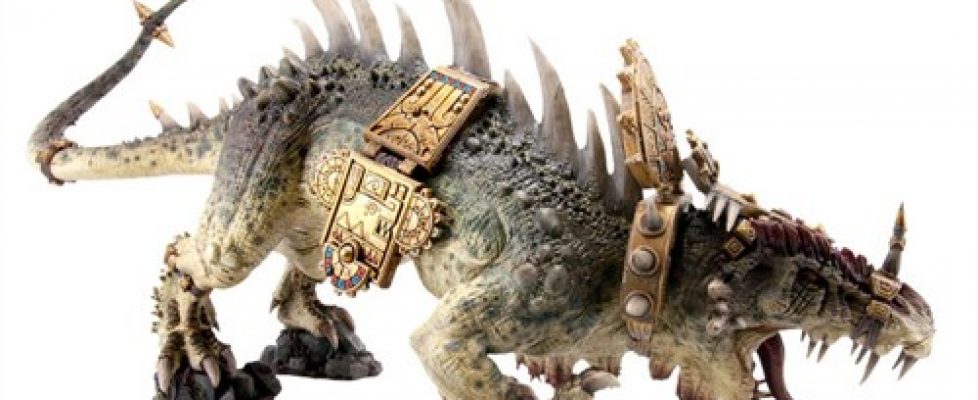
Dreaming of the Dread Saurian!
So I’m working on a clients Lizardmen Army at the moment, hard at work, and it got me thinking about the Dread Saurian. And specificially, how to build one!
This guy, while awesome, is 130 GBP or basically $220 USD. That’s not a small order.
While I love a cool model, I also love to save a buck, so it got me considering good base figures to convert into the Saurian.
These are a few of my ideas that I am opting to share with the community.
Here is a base model on EBAY I am considering. A 1/13 scale Revell Sailback. Not bad, it’s got the right overall shape and scale. Kinda reminds me more of a giant salamander., And it’s not very dynamic. But for $40 bucks, not a bad base figure to start playing with.
Here‘s my current favorite idea. A Pegasus Hobbies 1/12 Scale Kothoga from the ‘Relic’ movie. I bought one of these years ago on a whim, and never put it together. Hey, it was a good deal. The scale is right and it just need a good Saurian head. Also, that spine has got to go. I dug through my bits box and found a dozen or so horns for his back ridge and put them in the same box, now labelled aptly ‘Saurian Kit Bash’
For the head, I was thinking of using a spare T-Rex head from some Dominatrix kit bashes I did a few years ago. I have a dozen or so of these in a box and just didn’t know what to do with them. I was thinking about some sort of lizardman temple board with sort of large stone t-rex heads, like the stone heads on Easter Island, but I can spare one for this project.
Interesting enough, the howdah presents one of the hardest problems on this particular model. For those, I turn to bits vendors for some of their spares, that I can hack up and paint golden to give the illusion of a Howdah.
What this all means is with materials running around $60 buck and another $50 for assembly, I can comfortably charge a would be client about $110 bucks to build this model. If I were to charge another $100 to paint and base the model, and then $10 to ship, that means the entire kit bash would run the same price as the base FW model!
So . . my next question is . . . IS THERE A WOULD BE CLIENT OUT THERE interested in commissioning this model through WMG?
I am eager to build this model, but need a client to book the studio time between commissions!
Turnaround on this figure would be about 4 weeks once initial payment is received, and overseas shipping will be slightly higher.
If YOU are that would be client, email me at [email protected]
I look forward to speaking with you!
Until next time, PUT YOUR MINIS WHERE YOUR MOUTH IS!!!
Caleb, WMG

Want to win a massive painted Ultramarines army? Got a couple of bucks?
Tickets go on sale October 1st. With each ticket you buy, you have a chance of winning an Ultramarine army, donated, built and painted by a select consortium of wargaming artists.
The Storm Wardens project from 2010 raised over $16,000 for Doctors Without Borders and last years Salamanders project raised over $12,000!
The project is being headed up by youtube personalities IDICBeer, bloodofthefallen1 and WarlordsWargaming, and all the proceeds from the project will go towards the fantastic work done by HELP FOR HEROES. All the minis in this project were donated and painted by the contributors.
HERE IS A DIRECT LINK TO THE OFFICIAL HOMEPAGE of the project.
This project is ongoing, so be sure to check back on a regular basis to see updated pics from all the artists.
Tickets will be available to buy at a cost of £1.50 GBP each and all the money made from the raffle will go to the HELP for HEROES charity. The raffle is a worldwide event and postage of the final army will be free to the winner. Sadly, we are unable to cover any addition charges that may occur, such as import tax etc. The final Draw date is still being finalised, but we will announced the draw details in the near future.
CLICK HERE TO BUY TICKETS
PLEASE NOTE
For every £1.50 ($2.50 USD) you donate, you will be entitled to a single entry into the raffle. So if you donate £4.50 ($7.50 USD), you will be entered three times. Obviously any donation amount is most welcome, but if you want your donation to have a chance to win the army, please allow us to see the amount you have donated, and leave your contact details for us. You will not receive a physical ticket, but all entries will be recorded and held in a safe place by us.
Main Contact Details:
Please note that we are no longer looking for more painters for the army, but if you would like to contribute financially, you are more than welcome. We are always looking for ways to promote this worthy cause. So if you can help or have any questions, please contact us here:
[email protected]
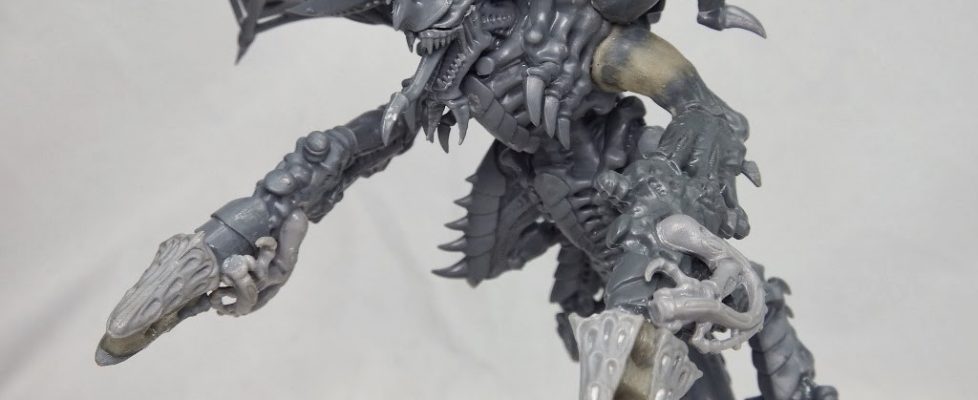
It’s a bird, it’s a plane! It’s . . .kitbashed brainleech devourers?
Up, up and away!!!!!!!
Greetings fellow wargamers! Caleb with White Metal Games here!
With Forgeworld recently releasing their own set of twin linked devourers, lots of folks were plenty excited! Finally, easy access to a pair of devourers for your monstrous creatures! I have to admit, they look pretty snazzy. You know what I’m not crazy about? The price. 13 GBP for 2 little arms, plus shipping? Forget about it! That’s over $20 USD for just a few bits. Does that seem like a good market value for these?
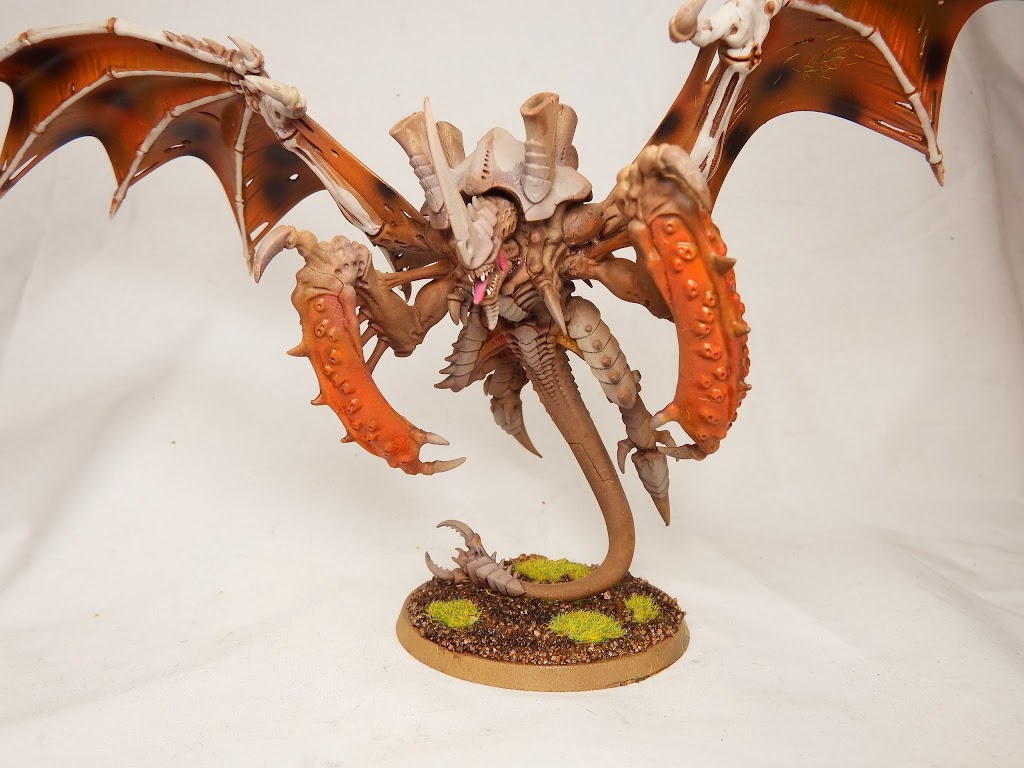
Many of you will have been using the spare FBH’s from our tervigon builds, but what about guys like me that like to use them for crazy conversions? I need to save those fleshborer hives for other projects, like this guy!
Another thing I might point out is that Fleshborer hives now have 18″ range, so they have ‘some’ viability in a modern list. Twenty shots is nothing shabby, even if they are only strength 4. So maybe you want to hold onto those t-fex options for your own magnetized t-fex.
To exacerbate matters, devourers for MC’s are only readily available on the secondhand market (and they go for an arm and a leg there) or through the carnifex kit. But even then you only get one set!
So what we need then is a way to build a poor man’s Devourer for Monstrous Creatures and a Poor Man’s Twin-Linked Devourer with Brainleech worms for Flyrants!
Fortunately the solution to both is simple: Termagant Fleshborers and Monstrous Creature Arms.
You can get Tyranid Devourers in very large lots here! Less than 10 bucks and you’ve got enough devourers to do an entire brood of carnifexes . . . .carnifii? Whatever, you get 15 of them.
Here’s how the conversion works. Couldn’t be simpler:
Firstly take a pair of monstrous creature spare arms. Deathspitters come to mind. You get two in every Carnifex kit, so you’ve likely got a set or two lying around. If you don’t, well, they are at least reasonably priced on ebay.
Clip or Cut off the barrel of the deathspitter. I prefer to cut, using a nice sharp exacto knife or box cutter. Be careful, both are sharp.
Do the same with the devourer.
Now play musical barrels. Presto! And that wraps up another thrilling conversion.
What’s that? Lame you say? Fine, let’s amp it up a little bit.
Take two MORE spare devourer arms, and a spare Tyranid Heavy Weapon. I like the venom cannon for this, because I have a bajillion of them, but use whatever you like.
Cut the barrel off the VC. Try to leave the little hose on the gun, if you can, since that’ll look nice on the final model.
Clip off a few Devouer Tips. Just the tip. Also trim off the spikes on the bottom.
Glue on at the top half of the exposed Venom Cannon Barrel, and one on the bottom half. Be sure to leave a small gap between them for the tendons.
Okay, now on the reverse of the gun, you are going to have an old slot for the previous feeder tube. You can either keep this as a feeder tube (if you want to keep this as a TL Devourer with Brainleech worms for say a Carnifex) . . .
. . . .or use those spare Devouer tube arms you have from the Termagant kit to plug the gap. I add mine on like below. Be sure to trim off the ball joint from the small end of the hose, otherwise it won’t sit flush against the weapon barrel.
Okay, when thin enough, plug the gap with just a little sliver of the putty.
Using a sculpting tool, smooth out the profile
Once reasonably smooth, use your tool, a pen, or a toothpick (or whatever you have that is thin and pointy) to poke a few small holes in the putty. If you are really cool, then poke a matching hole on the opposite side. This will give you that ‘tendony’ look, since it’ll actually be going through the entire length of grey stuff.
Using the tip of the tool, scratch out a few texture marks on the putty, just to give it a little definition.
And there we are. I made a matching set of two for a Flyrant.
Since Heavy Venom Cannons only come in right arm selections, I had to clip the socket for the arm and flip it around to make a lefty. Then I used a little putty to cover the gap. Sure, you can still see the inside of his hand on the barrel, so it’s sort of Rakshasa like in that regard, but meh, for me, that little detail doesn’t bother me. Clearly by now you realize I am NOT a perfectionist. I am a generalist.
Here’s the top profile on the ‘lefty’ gun to give you and idea of what I was talking about.
And the finished model. Bear in mind, if you don’t LOVE these devourers, and why would you, you trolls you . . just magnetize them until your broke assess can afford the real things.
Til next time, PUT YOUR MINIS WHERE YOUR MOUTH IS!!!!
Greetings fellow wargamers! Caleb with White Metal Games here! My how the time flies. It’s already spring and summer is on the way. Around eight months ago, I published an article on BOLS regarding the ‘Client Perspective’ on miniature painting services.
Here’s the link to the first article.
To reiterate from the first article, the goal of this project was to get first hand experience with commissioning models from other services, to gain a ‘client perspective’ on orders. Another goal of this project was to experiment with outsourcing projects, weighing the pros and cons of using international painters, whilst connecting the right model to the right painter/painting service to get the best possible results. After all, not every painter can be expected to paint every model equally well. For example, maybe I love painting Tyranids, but maybe Studio XYZ doesn’t and it shows in their work. To each their own.
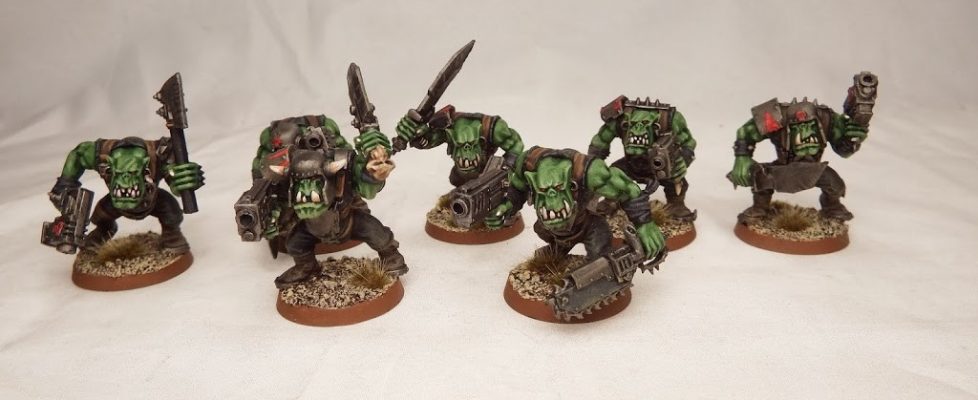
Studio B: Based in Eng . . er . . SCOTLAND. This studio had really cheap rates, so I commissioned a squad of Orks. Studio was to buy the box, assemble to order, and paint to avoid the international tariffs.
Studio C: Based in the North America. A small squad of Necrons, with lavish OSL. Assembled at WMG and sent to the painter.
Studio D: Based in the North Amer . . . er . . CANADA. A small collection of models, including a greater daemon, a Land Raider, some zombies, some odds and ends, etc. Assembled at WMG and sent to the painter.
Studio E: Based in England. This studio impressed me with their work, so I sent them a giant daemon prince to paint up
So let me just go ahead and apologize now. In the first article I claimed several of these studios were in parts of the world that they in fact weren’t. In point of fact, studio B and studio D I listed in the entirely wrong countries, corrected above. In my defense, I was shipping models all over the world at that point, so confusion wasn’t so unexpected.
Studio B:
I came across Studio B on a lark. The Studio was out of the game (pun intended) for a while and has only recently gotten back into wargaming and painting. He is in the process of rebuilding his portfolio, so he was willing to cut me an amazing deal on a squad of Orks.

The models arrived in good shape with no breaks and the pictures, well, you be the judge. I thought he did a great job.
Because this studio did such amazing work, I’d like to officially endorse Fraser and Dark Materials Miniatures. Fraser agreed for me to share a link to his studio directly: Be sure to check out his most recent work on his facebook page here!
I’d also like to apologize to Fraser. In the original post I commented DMM was based in England. Fraser was quick to point out that he is from Scotland! Sorry, Fraser . . .
Of note, DMM is one of the few if not the only Scottish based miniature painting service that I am aware exists. Are they any other Scottish painting services out there? If so, please be sure to sign up for our Miniature Painting Directory, here.
Studio C:
I found this studio through Facebook and I was blown away by the quality of their work. In particular I liked their weathering techniques. So I contacted them to commission a squad of Necrons and a Cryptek. I specified Black Necrons with some heavy weathering, and lavish Red OSL. We also talked about the models having some other metallics splashed on, like gold, to create some contrast.
The painter told me about 4-6 weeks once he got the models to be done. I sent the models off, patiently waited 5 weeks, then contacted him. The painter assured me they were nearing his bench, but due to Ostheoartritis he didn’t paint as fast as he used to . . . wait a second, Ostheoartritis?
This isn’t something that I would expect him to advertise on his website, and his models looked good, but the lesson here was that you can’t learn everything about a painter, in particular their medical history, through a website. Maybe this is why some studio artists stay off camera?
Around the 11 week mark I got an email like this:
“i can finish it this week, its just an issue of the other commissions
that are also eager to get their stuff back. It sucks losing a painting
partner… (OMITTED) started school and it taking up WAY more of her time 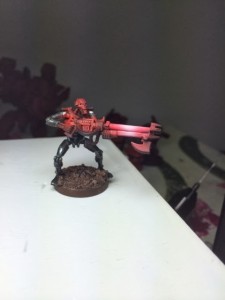
to have to restructure what I do here severely. Ill probably just stick
to individual models and showcase stuff.”
A few more weeks passed and I finally got the picture of the first totally completed model, pictured on the right.
Now let me just reiterate here . . . payment was sent up front for this squad of 13 models on August 7th, and the painter estimated completion of the project in about 4-6 weeks. Even with a week of shipping, that would have put project completion at the end of September.
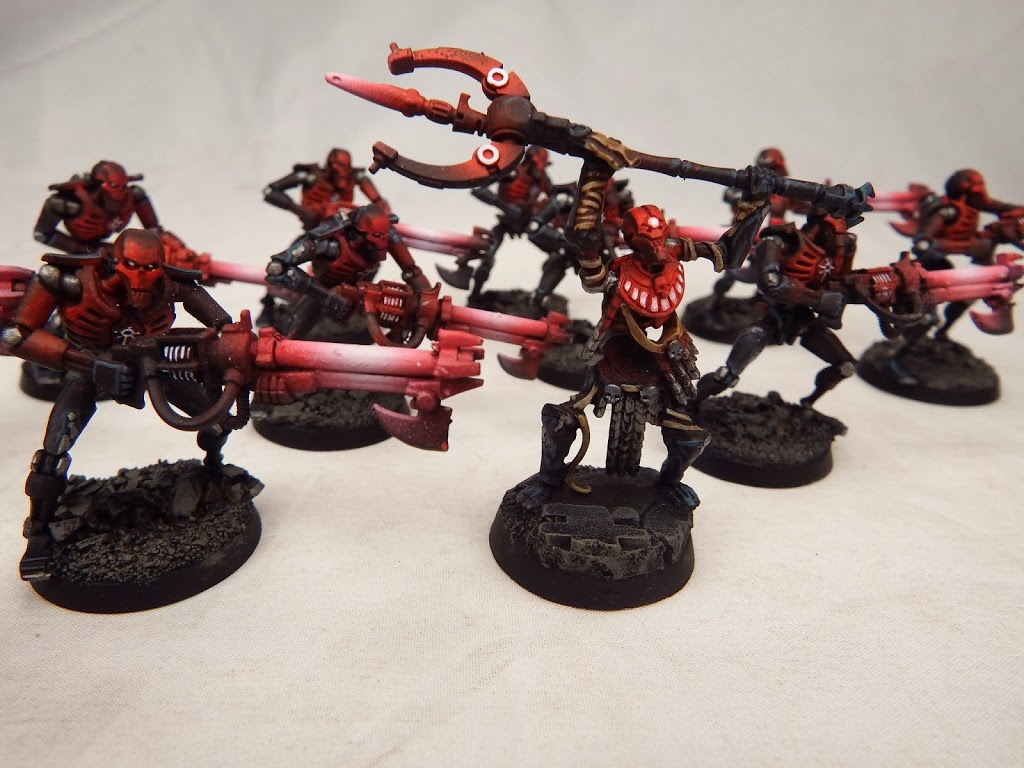
While I personally can relate to this painters dilemma, I did feel a bit mislead. In addition, no where in this email where the words “I’m sorry for the delay in processing your order” or something of the like present. I felt like a simply apology would have gone a long way here, and it’s lack was a sore spot for me when dealing with this particular painter. My guess, however, is that the painter is a bit older and perhaps there’s a generational pride issue going on here.
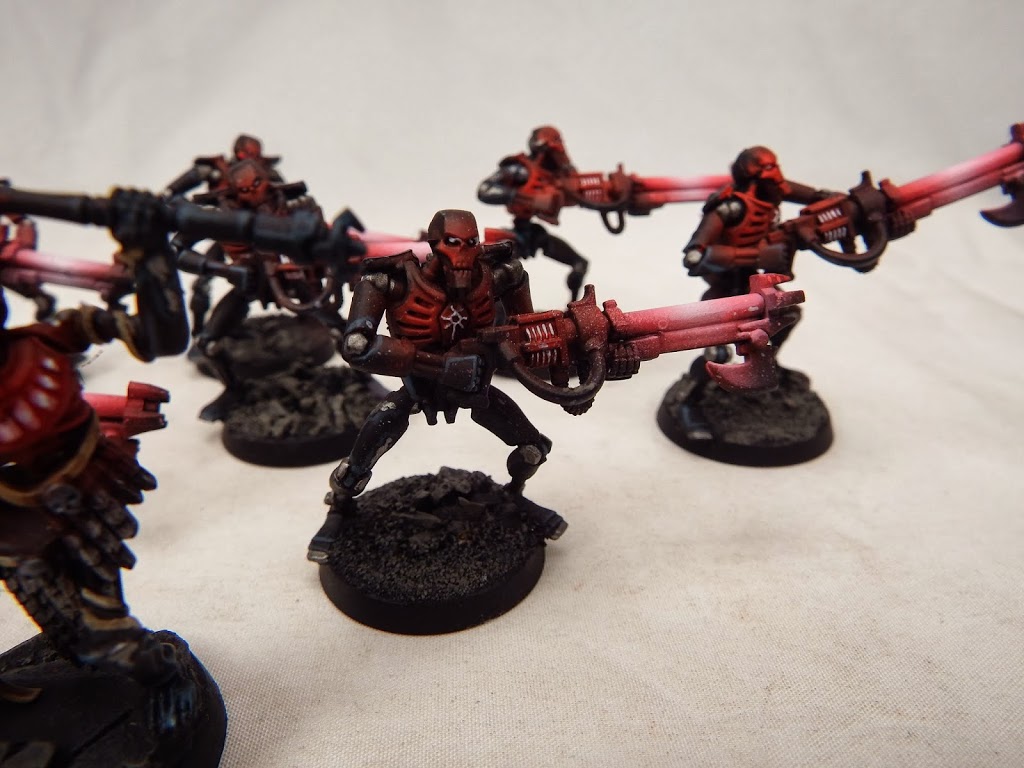
A MONTH LATER I finally got tired of waiting and emailed the painter, who ‘thought he had emailed me already’. The models were done, but he was unable to photograph them with anything short of a camera phone (which confused me because on his website he takes photos all the time). The photos you see above were taken in my studio.
So, the models were finally received 14 weeks overdue. No apologies for them being late, no offer of a refund of any sort, no questions about whether I liked the models or wanted any changes, nothing.
It goes without saying I will not name this studio, so as to avoid any risk of slander. This was a mixed bag because the quality of the models were good, but the time and attitude of the painter was pretty poor.
Studio D:
Studio D got my second to largest commission, minus the full army that was discussed in part one of this series. This commission was for a random assort of models, mostly large, including:
A Lord of Skulls
A Skarbrand Conversion
A Landraider
A custom converted Changeling
A custom converted Ku’Gath.
So a big commission, but not so big a talented commission artist shouldn’t be able to handle it.
The commission started very strongly. In Mid October, about a month after the models arrived, he started posting some painted pictures. Skarbrand was first, and then he quickly threw some paint on the Lord of Skulls. This was around Halloween.
Over the next month, he posted a few other models on his webpage, mostly personal projects, and I didn’t see any new updates in November.
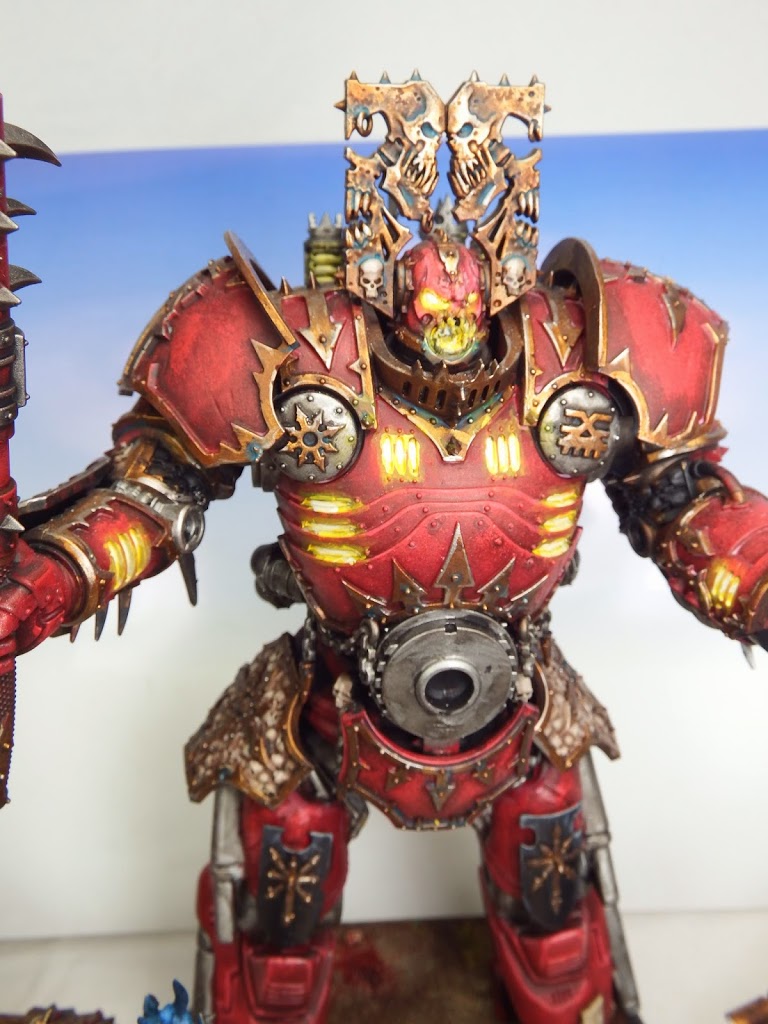
Finally at the end of January, the artist began posting some new pics of finished models. So at this point the commission is about halfway done and we’re around 4 1/2 months in. That’s a long time to paint what boils down to a few vehicles, a squad, and a few characters, once of which was yes quite large.
At the end of March, almost six months later. the painter contacted me with final pics and let me know the projects were all done. In the end, I didn’t get pictures for the Changleing or the Landraider, didn’t even see them til they showed up at my door. The painter related to me that they used someone else to photograph their minis, and that was the cause for so many delays.
So, to be clear, it took about 6 months to get these models back from the painter. Although I generally liked the painter, I definitely thought he dropped the ball on this commission and I can’t recommend his service. I think he’s young and time may change the way he does business. My guess is from looking over his website that he gets excited about personal projects and uses commissions to fund them, but on his own schedule.
I also never fully understood why his personal projects seemed to be featured so often on his blog, but his commissions seemed liked a back burner object. I see plenty of pictures of his personal projects and custom models, but as a client, my models are rarely featured. For me, it’s the opposite When I have an active commission, my personal projects are pretty much forgotten on my bench.
It’s also worth nothing that when shipping to Canada, and I didn’t know this at the time I placed the order . . . when sending anything into Canada even if the package is sent as a gift, anything over 100 is by law to be met with the following charges: Duty, GST, PST, and handling costs from the Canada Border Services Agency. The receiver has no control over the amount that is charged towards the package, but they have to pay the extra fees. There is a form the receiver can fill out that says the goods have left Canada and they should refund the $$$. So, lesson her, tarriffs can hurt you on out of country commissions.
So another lesson I learned on this project was that shipping models INTO Canada has hidden expenses all it’s own. The painter let me know that he would try to get my money back to me when the package shipped out.
So far, still waiting.
Studio E:
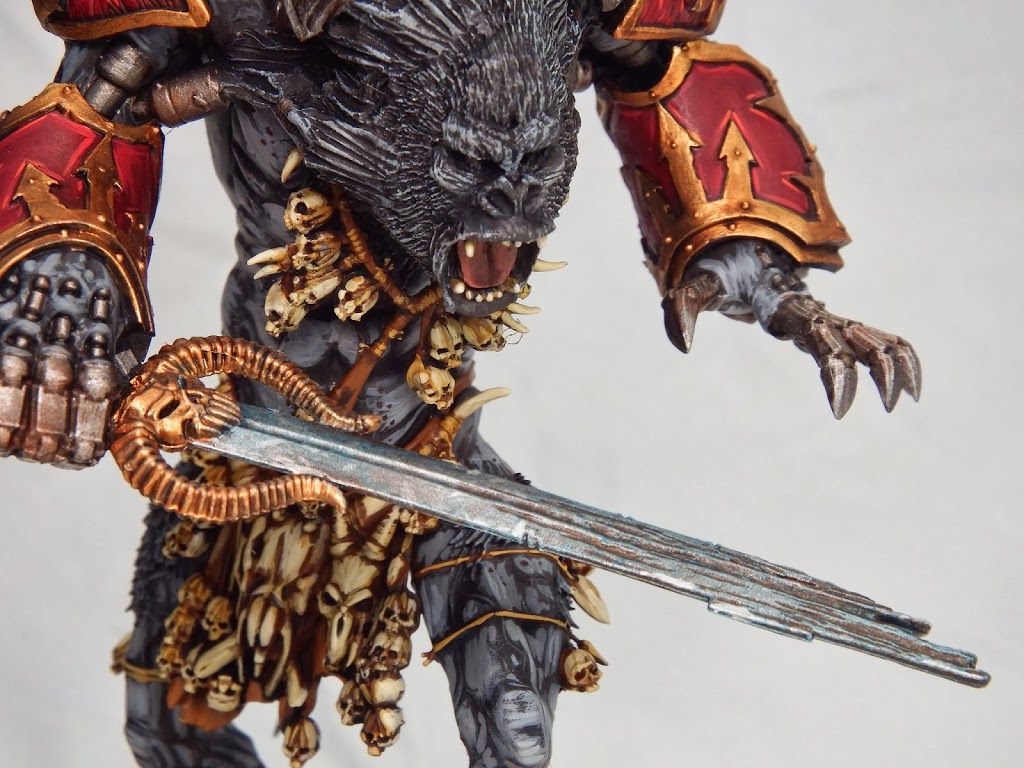
Regarding the painting of this model, this was very nearly a flawless commission. Once more, the painter received the model in good order, painted it to a high standard for a fair price.
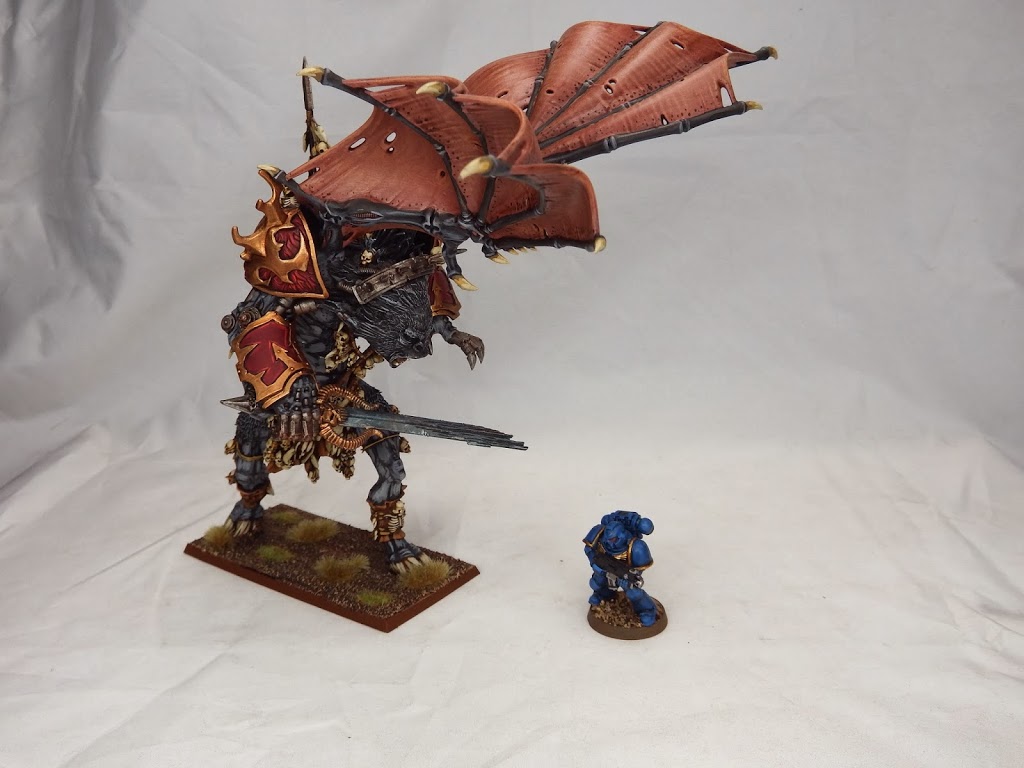
So allow me to fully recommend and endorse Twitchy Droid Painting and Jamie especially! Great work, Jamie!
Before I wrap up my article, let me point out another article I discovered in my research regarding some of the pitfalls of commission painters, published right here on Bell by Brent, and I thought it was a pretty good review of miniature painting as a whole. I particularly like the bottom half of the article, where he measures his time vs. the value of his time when resetting dozens of models.
http://www.belloflostsouls.net/2012/04/brent-pitfalls-of-commission-painting.html
Final Conclusions:
Of the five studios I contacted regarding commissions, I would say only 2/5 were flawless commssions. The others suffered from everything from camera problems, arthritis, false deadlines, you name it.
So, what does that mean for the miniature commission painting industry in general?
First lesson: NEVER PAY more than a deposit up front. If the artist requires full payment up front, be leery. When was the last time you paid a carpenter to fix a leak before they actually fixed the leak?
Overseas = Tariffs. Period. Whether it’s coming or going. Or both.
Paypal will only allow refunds on items or services for 60 days after the purchase. If the transaction takes longer than 60 days to complete, which happened with at least two of these cases above, then you get ZERO help from Paypal to get your money back. And you’re out the models too!
There are a few ways you can protect yourself in these instances. The first is to not pay up front. Or only pay a deposit up front. That’s the biggie.
Secondly, insist on a tracking # when they ship the items, and it’s usually worth it to have them take out insurance as well. It’s normally less than $5.00 for most packages, even those of high value, so for goddness sake spend the extra few dollars and get them to insure the package.
Create a timetable you are both happy with and stick to it! Get it in writing. It doesn’t have to be a written contract, but a simple email where they agree to the terms should suffice. If the artist is doddling, call them on it! When you get close to that 60 day mark, open a case against them. Don’t take their word, make them own their words. Hit them where it hurts, their wallets.
If after all this the artist ups and disappears with your models and $$$, what should you do. Well, to be honest, if it’s less than a $1000, it’s probably not worth your time to do anything. Write it off as a bad experience, post some warnings on their social media pages to other buyers, and call it a lesson learned the hard way.
If it is over a $1000, maybe consider looking into small claims court and suing them, but that may be a headache you aren’t ready for.
This entire process has made me really appreciate what Goatboy does every week at Full of Monkey where he posts every client whose models he is currently working on, but also the status, and then status pics when applicable. Not only does it give you a reason to tune in every week to see what he’s been up to, but it also shows his workload and gives you an idea of his process as well.
Through my interactions with Goatboy, I actually outsourced an entire army to him, just because I like his workflow and his style of work. You can see the beginnings of our joint venture, the Necrorks/Orkrons here!
How did I change my business practices based on what I learned here:
Firstly, I only outsource to other artists I have met personally and that I have vetted through friends.
Secondly, I NEVER give them more than a few units at a time, with the exception of Goatboy at this point.
Thirdly, I contact my clients every Monday to give them updates on their projects. I also post update pics on my facebook page for the entire world to see and track the progress.
In addition, when I am contacted by a client about a potential commission, I provide the client with a quote and if I don’t hear from them in about a week or so I contact them to follow up and ask if they have any additional questions/concerns about the quote. In some cases the clients are just busy and the follow up is the difference between booking a gig and not.
However, in most cases it’s a sign the client has lost interested or decided to go with another painter, which of course if their right. In that case I like to politely ask the client why they went with another service. 9/10 it’s price.
One repeat client of mine contacting me about a quote and when I asked him why he ultimately went with another client he had this to say: “With a local Montreal guy,
who charges no shipping cost yet brings the miniatures to me,
no chance to damage the goods through parcel shipment,
no chance to get charged Custom Fees,with a fast turn around time between two days and two weeks,
Losing out to a broke college student is the LEAST of my problems. I’m not trying to underbid a college grad working for less than minimum wage. This guy won’t be able to charge that rate for long unless he’s living out of his mom’s basement for the foreseeable future. My competitors are the actual studios out there . . Frontline, Golem, Full of Monkey, BTP, Smell Like Wargaming, etc. Those are the folks I need to price towards, and in fact, so long as we all price ‘about’ the same way, it really comes down to a client preferring the ‘look’ or style of one artists work above the other. After all, Coke and Pepsi cost about the same. But if you’re a Coke man like me, you’re a Coke man. Period. It’s not about the price, it’s about the preference.
Isn’t that the way it should be?
Advice to Painting Studios:
Treat your business like a business, and treat your clients like clients, not friends. Don’t put them off and beat around the bush. If you are behind on an order SAY SO. Let them know, and by all means, Apologize! Learn the value of the words “I’m sorry” and own it!
If you find yourself apologizing on a regular basis, maybe this isn’t the gig for you.
Advice to Potential Clients:
Cut the painters a break! Most of the time Miniature Painters, with a handful of exceptions, are either very young or doing this part time, on the side, between jobs, just trying to make a buck.
The reality is miniature painting is a challenging industry to break into. Their is more competition than ever before and the average client wants to pay $10 or LESS a miniature and the average miniature takes most painters upwards of 40 minutes to an hour from the time they lay down the first layer of primer to the final layer of varnish. So while it’s not bad money, it’s not great money either, and very few of us can support ourselves on just our miniature painting $$$. That means we are budgettng your projects and time against our personal lives.
Remember, we’re people too. Cut us a little slack from time to time.
JOIN US!
If you have a miniature painting service and would like to be added to our growing list of miniature painting services, then you can do so by adding your service here
COLLABORATE!!!
Despite my misadventures with several other studios, I still believe in the value of collaboration. I have begun to assemble a collaborative gallery here showcasing some of the projects I have teemed up on with other studios to create. Most of the time in these cases, I do my own building and transfiguring, and then send the other studio the models to paint.
If you are a miniature painting studio, looking to collaborate on a project, send me an email! I’d love to look over your gallery of work and if the price is right, perhaps we can do a little tandem business!
PUT YOUR MINIS WHERE YOUR MOUTH IS!!
Caleb
White Metal Games
If you found this tutorial useful, be sure to check out more of our work on our homepage, or at the very least, like us on facebook! We also have a new podcast called Warcouncil where we share other cool hobby tips! And you can see more tips through our Youtube channel!
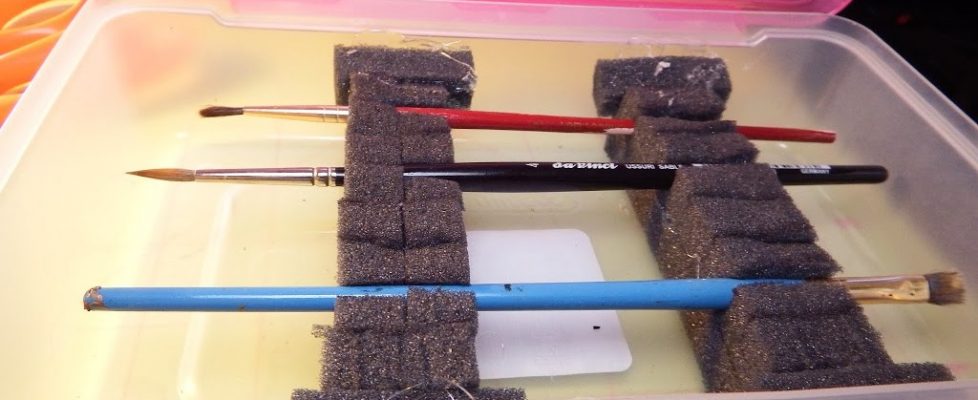
Tired of your brush tips getting bent out of shape? Follow this simple tutorial to protect them!
Caleb with White Metal Games here.
Well it’s a new year and with a new year come new toys! One of the things I received over the holiday was this brush box! Pretty cool right? Here’s the problem . . . it’s 14″ long! So it got me thinking about how to build a brush box on a limited budget.
The idea behind a brush box is to give you a way to store brushes and at the same time keep the tips from warping or bending when you travel.
To complete this tutorial, you’ll need the following:
A hot glue gun
A pencil box (Another option is to buy one of these really nice looking boxes! )
Spare foam (Most of us have some spare foam lying around, either from blisters/clam packs or from our beloved pluck and pull foam trays. So grab some foam in roughly the same style. The stiffer the better)
Sharpie
Scissors
Here’s how it works:
Loosely lay out the foam in a parallel pattern. You want the foam to be two layers deep: one layer to provide cushion and the second to actually hold the brushes in place.
Using the hot glue gun, glue the 1st layer into position.
Use a sharpie to mark some roughly straight lines on the two pieces of foam. These marks are where you are going to cut. Lining them up now means when glued into position the brushes will line up too.
Using the razor saw, score the foam. You don’t want to cut all the way through the top layer of foam. Just about as close to 3/4 mark as can be .
I found in testing that cutting the to halfway point didn’t quite give me a good grip on the bigger brushes.
Now, using some of the leftover foam, cut the foam down so that you can wedge it into any deadspace on the fringes of the box.
Your goal here is to ensure the foam tightly grips your brushes, so by wedging the foam in, you are compressing the foam, thus ensuring a tight grip on the brushes when they are nestled safely inside the box.
Now proceed to hot glue the smaller pieces into your box. This was the messiest part of the excercise for me. I put blue on 3 of the 4 sides and quickly wedged the foam into the space between before it could burn me.
However, I DON’T recommend this method as that glue is really, REALLY hot. You might be better served to just put the glue on the bottom of the foam; safer and less messy that way.
Once done, test out your new brush box. The finished product should look like this.
As you can see (below) the foam is compressed enough that even gravity can’t drag these brushes down!
There you go! That’s it! Total time it took me to make this was less than ten minutes, with gathering supplies! So don’t make any excuses. Find your mom’s hot glue gun, grab some spare foam, and go to town on this thing!
PUT YOUR MINIS WHERE YOUR MOUTH IS!!!!
Caleb, White Metal Games
If you found this tutorial useful, be sure to check out more of our work on our homepage, or at the very least, like us on facebook! We also have a new podcast called Warcouncil where we share other cool hobby tips! And you can see more tips through our Youtube channel!
Caleb, White Metal Games